 Migrate a Sentinel Visualizer Database to Microsoft Azure
Sentinel Visualizer stores its data in Microsoft SQL Server databases. The databases can be hosted in a local copy of SQL Express on your machine or SQL Server on your network.
Identify the SQL Server database to migrate to the Microsoft Azure cloud. If you want to start with a blank one, create a new database and migrate that.
Quick Instructions
- Create a Microsoft Azure account (subscription).
- Within your Azure account, select or create a SQL Server, and add a new database to it.
- Using Microsoft SQL Server Management Studio (SSMS) on your desktop, open your local SQL Server, right-click on the Sentinel Visualizer database to move to the cloud, and select "Deploy database to Microsoft SQL Azure database".
- After it's migrated, from Sentinel Visualizer, open the database hosted in your Azure account.
Full Instructions
Microsoft SQL Server
 These instructions assume that you:
- are familiar with the basics of SQL Server database management
- have a Microsoft Azure account
- have security permissions to perform the tasks to copy and create a new database
Microsoft Azure Account
 These instructions assume that you already have:
- a Microsoft Azure subscription
- a SQL Server exists on the subscription or you can add one
- a new (empty) database is on your Azure SQL Server
If the server or database doesn't exist, you'll need to create them from the Azure Portal.
Migrating a Sentinel Visualizer Database to the Cloud
There are three ways to migrate a database to SQL Azure:
- Use Microsoft SQL Server Management Studio (SSMS) on your desktop to deploy the database to your cloud account.
- Create a backup (.BAK file) of the Sentinel Visualizer database. Copy/move the BAK file to your Azure storage account, then restore the BAK file from within your cloud account.
- Deploy the database directly from within your SQL Server host.
For any of the three options, you need to install the FREE Microsoft SQL Server Management Studio (SSMS) on your Sentinel Visualizer computer.
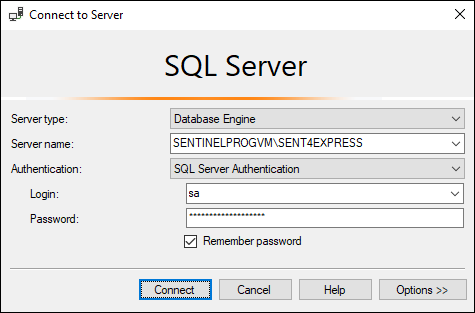
- Use Microsoft SQL Server Management Studio (SSMS) to deploy the database to your cloud account. Within Microsoft SQL Server Management Studio (SSMS), connect
to you local or shared instance of Sentinel Visualizer. Consult your Administrator for your shared server credentials. If you're connecting to the local
instance (SENT4EXPRESS), the login information is below.
- Login: sa
- Password: S3ntinElL0gin:7@FMS
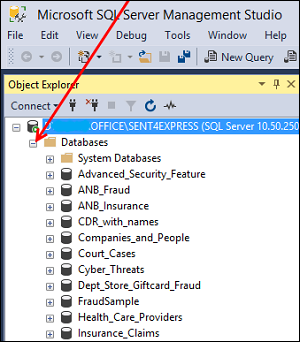
- Click the plus sign (+) in the top-left to expand the Databases Folder.
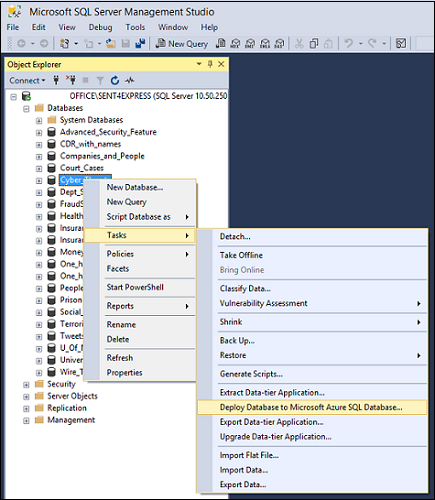
- Right-click on the database that you want to move to the cloud. Select [Tasks] and click [Deploy Database to Microsoft Azure SQL Database...].
- Connect to the cloud server. You'll need the cloud account login credentials.
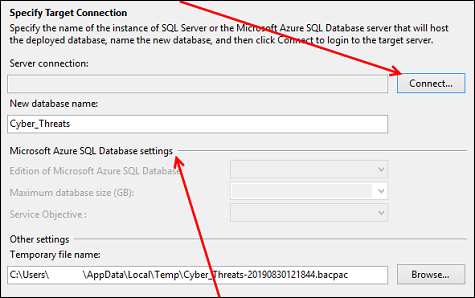
- Choose your desired Azure settings (this can/will affect the cost of your Azure services). Click [Finish].
The restore can take more than a few minutes, especially with a large database. After you see "Completed" at the top of the screen, try opening that database from within Sentinel Visualizer.
Open the Database in Sentinel Visualizer
- Launch Sentinel Visualizer.
- Select the [File] tab on the toolbar and click [Open Database].
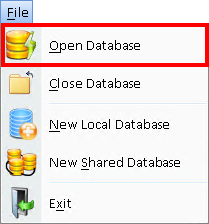
- Enter cloud services account name and click [List Databases].
- If prompted for Windows or SQL Authentication, choose the desired authentication option.
- Upon opening the database, if prompted, enter your database (Sentinel Visualizer) login credentials or use these default credentials:
- Username: admin
- Password: password
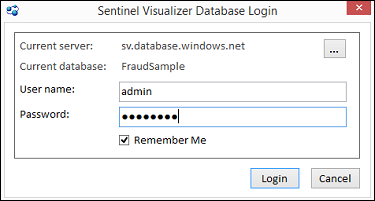
- Confirm that you are on the correct server and the correct database by looking in the lower-right part of the Sentinel Visualizer software.

If you get this response:
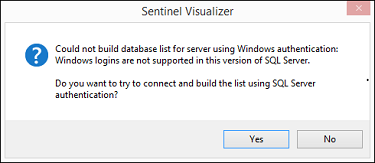
Click [Yes] and then enter the appropriate log-in credentials from your cloud account, here:
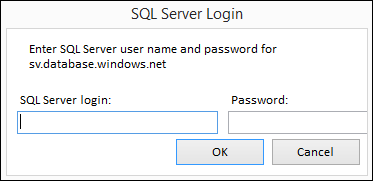
Choose the desired database from the results list.

For SQL Server Authentication, enter your cloud account credentials.


